Whether you’re planning to start investing in crypto or you already have a few coins to your name, you’ve probably come across Coinbase. It’s not hard to miss since it’s one of the world’s most popular crypto exchanges. Currently, it takes the second spot of CoinMarketCap’s list of top cryptocurrency exchanges.[1] That says a lot about its credibility and reliability.
Before investing in crypto, familiarize yourself with the platform first. We’ve put together a comprehensive explainer that will help you use this exchange, from creating a Coinbase account to cashing out your funds. Let’s roll!
What is Coinbase?

Started in 2012, Coinbase is a crypto trading platform that allows you to buy and sell digital currencies. It may even double as one of your wallets since it allows you to store crypto.
According to Coinbase, it has more than $270 billion assets on its platform and over $547 billion volume traded quarterly. It also has more than 89 million verified users. That means a lot of people trust the platform.
Currently, Coinbase is available in more than 100 countries.
Is Coinbase Beginner-Friendly?
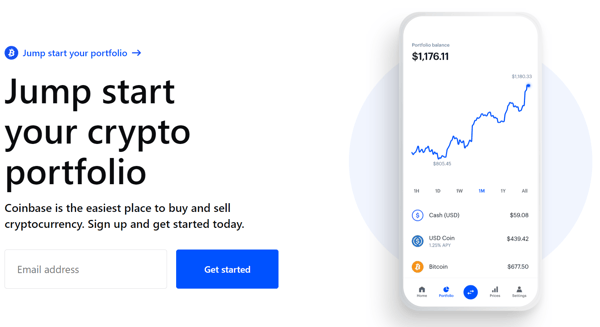
Yes. Coinbase positions itself as a beginner-friendly exchange. The platform design's straightforward and easy to navigate. Just like other crypto trading apps, you can easily see your balance and access the watchlist, which shows you the prices of different coins.
Overall, the design's pretty intuitive. As such, the learning curve when it comes to trading shouldn’t be too steep.
Is Coinbase Safe?
Yes, Coinbase is one of the most trusted crypto platforms in the world as it supports the most popular crypto currencies. Moreover, it safekeeps and stores digital assets in a secure offline storage.
It also has crypto insurance, and all USD cash balances of up to $250,000 are covered by Federal Deposit Insurance Corporation (FDIC) insurance.
Read more: Investors, Beware: Common Cryptocurrency Scams and How to Avoid Them
Is Creating a Coinbase Account Free?
Yes. The Coinbase fees and charges will only come in once you start trading or using the platform’s services. Here are the types of fees that you may incur:
- Wallet service fees: Coinbase’s USD Wallet and Hosted Cryptocurrency Wallet are free services. So, if you transfer crypto from one Coinbase wallet to another, you won’t be charged any fees. However, transactions on currency networks will incur fees.
- Trading fees: When you buy, sell, or convert crypto, expect that you’ll be charged some fees. Coinbase calculates these fees based on the time of your order placement, order size, market conditions, and preferred payment methods.
- Credit fees: Coinbase allows you to borrow USD from the platform or its affiliates using your bitcoin as a collateral. And if ever Coinbase needs to sell your collateral, the exchange will charge you a flat fee of 2% of the total transaction.
- Coinbase Card fees: Together with Visa, Coinbase developed a physical card that you can use for buying items offline or withdrawing funds from the ATM. Using the card charges you a flat 2.49% transaction fee.
- Staking services fees: Want to participate in staking for a chance to earn more?[2] Take note that Coinbase’s staking services also come with charges. If you receive a staking reward, Coinbase will get a 25% commission.
Read more: Crypto Wallet in the Philippines―What It’s For, How to Get One, and the Best Crypto Wallets
How to Create a Coinbase Account?
Ready to create a Coinbase account? The process is quite lengthy, but that’s understandable since Coinbase just wants to make sure that its new user is a real person. Here are the steps that you need to follow:
Step 1: Secure Your Requirements
Before the actual Coinbase account creation process, you’ll need to prepare certain documents first. Moreover, you’ll have to meet some system requirements to ensure a smooth platform experience. Here are the things you need to secure:
- Proof that you’re at least 18 years old
- Government-issued ID
- Phone number linked to your smartphone
- The most recent version of your browser or the latest Coinbase App. If you’re using the app, see to it that the operating system of your phone is also updated.
Step 2: Create Your Coinbase Account

For the account creation process, here’s what you need to do:
- Go to www.coinbase.com if you’re using a computer browser or download the Coinbase app if you want to access the platform via your smartphone.
- Click “Get Started.”
- Input the required personal details.
- Read Coinbase’s Privacy Policy and User Agreement.
- If you agree with the terms, check the box. Click “Create Account” if you’re using desktop browser or tap “Sign Up” if you’re on the app.
- Check your email and see if Coinbase sent you a verification email.
Step 3: Verify Your Email Address
The next step involves email verification, which requires the following actions:
- Open the email sent to you by Coinbase. The subject line should be “Verify Your Email Address.”
- Click the link in the mail. Doing so will take you back to Coinbase’s website.
- Once you’re back on Coinbase’s website, sign back in with your nominated email address and password.
Step 4: Nominate a Legitimate Phone Number and Have it Verified
Another layer of Coinbase account verification involves the nomination of your phone number. Here are the things that you should do:
- Sign in to your Coinbase account.
- Select your country then enter your phone number.
- If you’re using a computer, click “Send Code.” If you’re using the mobile app, tap “Continue.”
- You’ll receive a seven-digit code from Coinbase via your smartphone. Input the code into the form.
- In case you don’t receive any code, click or tap “Resend SMS.”
Step 5: Input Your Personal Information
After verifying both your email address and phone number, you’ll need to provide your personal information. Here’s what you need to do.
- Input the information shown on your government-issued ID. The required details are First Name, Last Name, Date of Birth, and Address.
- Answer Coinbase’s questions regarding the following: your purpose for using the platform, your source of funds, current job, etc.
- Finish this step by selecting “Continue.”
NOTE: The application for a Coinbase account ends at this point. For you to officially own the account, you’ll need to wait for a confirmation from Coinbase via email. The exchange will also provide you with instructions for the next step.
Step 6: Have Your Identity Verified
Remember that you can only buy and sell crypto or use Coinbase’s other services once your identity is verified. To verify your identity, you’ll need to do the following:
- Log in to your Coinbase account.
- Follow the prompt to complete the ID verification process.
Step 7: Choose a Payment Method
The very last step will require you to link a payment method that will allow you to pay for your crypto. In the Philippines, Coinbase allows payments through debit and credit cards. Check the Supported Countries page[3] to see the available payment methods in other locations.
Related article: Trade Directly for PHP: An Intro to New Crypto Exchange BloomX

How to Buy Crypto on Coinbase
Now that you’ve created your Coinbase account, you’re ready to buy your first coins. Whether you’re using a desktop browser or the Coinbase app, you’ll find that their procedures are identical. Here are the steps you need to follow:
- Log in to your Coinbase account.
- On your desktop device, click “Buy/Sell” to access the “Buy” panel. If you’re using the app, just tap “Buy” on the “Home” tab.
- Select the coin that you want to buy.
- Enter the amount that you want to buy. Alternatively, you can input your local currency.
- Click “Preview Buy” to check your purchase. In case you want to change some details, just click or tap the back button.
- If everything’s good, click “Buy” (desktop) or tap “Buy Now” (app).
How to Sell Crypto on Coinbase
If you want to sell your crypto for cash, the process isn’t that complicated. Complete your sale by doing the following:
- Log in to your Coinbase account.
- On your desktop device, access the “Sell” tab by clicking “Buy/Sell.” If you’re using the Coinbase app, just tap “Sell” on the “Home” tab.
- Select the coin that you want to sell for cash. Then, enter the amount that you want to sell.
- If you’re sure with the amount, click “Sell Now.”
NOTE FOR BUYING AND SELLING COINS: Remember that you can buy or sell as little as two (2.00) of crypto denominated in your local currency.
How to Cash Out in Coinbase
After selling your crypto, you have two options on what to do with your earnings. You can either buy more crypto or move the funds to your personal bank account. If you choose the latter, here are the things that you need to do.
- If you’re cashing out funds using your desktop browser, choose “Cash Balance” under “Assets.” And if you’re using the Coinbase app, tap “Cash Out” under “More” on the “Home” tab.
- Enter the amount of funds you want to move.
- Choose your transfer destination.
- Check the amount again. Once you’re sure, click or tap “Cash Out Now.”
Read more: How Much Bitcoin Do You Need to Buy a Car?
Coinbase Account FAQs
So far, so good. Being a Coinbase novice, you surely have a lot of questions about the platform. You may find some answers to your Coinbase account questions here:
1. What are the cryptocurrencies supported by Coinbase?

Coinbase supports a wide range of cryptocurrencies, including the most popular ones, such as the following:
- bitcoin (BTC) and bitcoin Cash (BCH)
- Ethereum (ETH)
- Aave (AAVE)
- Polygon (MATIC)
- Polkadot (DOT)
- Solana (SOL)
- Cardano (ADA)
- Uniswap (UNI)
- Gitcoin (GTC)
- Avalanche (AVAX)
- Axie Infinity Shards (AXS)
For the complete list of supported coins, visit Coinbase’s Asset Directory.[4]
2. What's the difference between Coinbase and Coinbase Pro?
When you start using Coinbase, you’ll immediately hear Coinbase Pro. Coinbase is basically designed for crypto beginners. On the other hand, Coinbase Pro is for more experienced or advanced traders. If you use both, you’ll easily notice that the main difference between them is the user interface.
Coinbase only has a few options when it comes to order placements. Meanwhile, Coinbase Pro gives users access to more advanced charts and trading options. Active traders can benefit more from Coinbase Pro since it generally has lower fees.
Individual traders can sign up at Coinbase Pro[5] right away as long as their country's covered by the platform. But if you already have a Coinbase account, you can easily upgrade to Pro. Just use the log-in credentials of your existing Coinbase account.
3. What's Coinbase Wallet?

When you create a Coinbase account, you automatically get a wallet where you can keep your coins. That wallet's called a hosted wallet since the platform stores the coins for you.
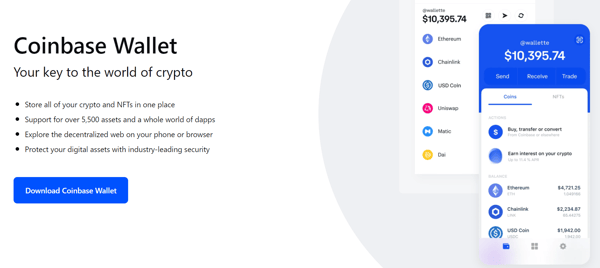
Coinbase also offers another kind of wallet called self-custody wallet. In this case, it's the Coinbase Wallet.[6] To put it simply, self-custody wallets are the opposite of hosted wallets since they don’t rely on third-party custodians to keep your coins safe.
If you use Coinbase Wallet, you’re the sole custodian of your assets, meaning you’re the only person who can protect them. So, in case you lose or forget your password, you may never access your crypto again.
4. Can I trade NFTs on Coinbase?
You can buy non-fungible tokens or NFTs on decentralized exchanges using Coinbase Wallet. Similarly, you can store your NFT collections in it. But soon, you can start trading NFTs on a Coinbase-owned NFT marketplace. Enter Coinbase NFT.
Coinbase NFT will allow artists and investors to mint, explore, collect, and purchase NFTs in one place. There’s no official launch date for this platform yet. Nevertheless, Coinbase invites those aged 18 and above and are residing in the US to join the waitlist.
Those on the waitlist will have early access to the NFT marketplace based on their ranking. One’s ranking on the waitlist is determined by the date of a person’s sign-up and the number of people they’ve successfully referred.
5. I have an issue with my Coinbase account. Who should I contact?
If you have issues on how to use Coinbase, from Coinbase account creation, purchases, to payments, just visit the Coinbase Help Center[7] and fill out a grievance form. You may also call someone from Coinbase through this hotline: +1 (888) 908-7930.
Read more crypto articles:
- What is PDAX and How to Trade Cryptocurrencies in It?
- How to Set Up Your MetaMask Wallet and Other FAQs
Final Thoughts
Truth be told, what's been covered in this article are just the basics of using a Coinbase account. But the platform offers a lot of opportunities to explore since it’s user-friendly and easy to navigate.
After taking all the baby steps, you can move to more advanced trading, which you may still find quite overwhelming. Nevertheless, there are many materials and guides out there that will guide you through the process.
If there’s one thing that you need to remember when investing in crypto, it’s that you should only use money you’re willing to lose. More importantly, know when to cut your losses.

Sources:
- [1] CoinMarketCap’s Top Currency Spot Exchanges
- [2] What is Staking in Crypto and How Does it Work? (Business Insider, 2021)
- [3] Countries Where Coinbase is Available
- [4] Coinbase Asset Directory
- [5] Homepage - Coinbase Pro
- [6] Coinbase Wallet Overview
- [7] Help Center


